

Table of Contents
[ad_1]
There are many strategies to insert texture to your jewellery – burrs, documents and waxes are illustrations of approaches that incorporate deep and pronounced texture to when simple surfaces.
Right here we are heading to show you a handful of brief and simple techniques to insert texture applying a array of polishing instruments, together with our favorite the Garryflex.
Step 1:
To clearly show examples of a couple distinctive textures we have slash out triangles to make into mix and match studs.
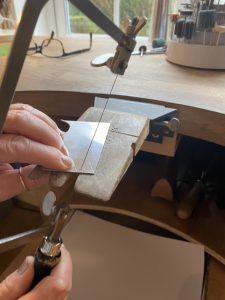
Mark out the sizing of your triangles on to the metallic utilizing a scribe. Cut out using your piercing saw, sawing on the exterior of the line to go away space for submitting or sanding later on. Also, recall to preserve that blade lubricated! We propose owning a block of wax screwed to your bench, simple to hand, to make certain your blade remains lubricated.
Sanding
You require to give yourself a very good cleanse tidy foundation to operate with, texture will not conceal any marks or scratches and can emphasize them even additional. If you reduce corners you will have to go again and fix it afterwards, so it’s far better to get it appropriate at this stage to stay clear of likely back again and setting up all over once more!
Do the job by way of the emery papers, from 150 grit to 1,200 grit. At each and every stage make certain all your scratches have absent from the previous grit prior to relocating onto the subsequent. If you have parts that are the identical measurement, sandwich every thing collectively with a modest sum of superglue and sand the edges all at when to save time

Stage 2:
Now it is time to texture. Listed here are just a several of the lots of diverse textures you can create…
No 1
Garryflex – coarse
Garryflex is effective, nevertheless fast and quick to use. Simply increase texture employing any motion you like, linear, circles or crosshatch. We have utilized a light strain with a flicking movement in random instructions to accomplish a raw edgy scratched look.

No 2
Frosting wheel – Yellow
Knife edge rubber wheel – Black
First of all, try to remember to shield on your own as these frosting wheels can be harmful. Have on safety goggles and shield your fingers. Hold smaller pieces in pliers to enable for a excellent grip and preserve your fingers out of harms arrive at (You can also keep your piece in a ring clamp). Texture the whole surface area with the frosting wheel working with gradual backwards and forwards movements. Next, I have additional some stripes using the coarse black knife edge rubber wheel. Attempt and retain this straight and repeat a couple of situations until eventually you get the required depth to develop a beautiful contrast concerning the stripes and the shimmery texture.

No 3
Nylon Abrasive wheel
Nylon Abrasive wheels presents a lovely matt complete. To give the piece desire use liner actions overlapping in a crisscross sample.

No 4
White added coarse knife edge rubber wheel
Applying the edge of the wheel develop minimal lined divots that go in random directions and overlap, so the complete surface area is stuffed but not much too deeply, just more than enough to see the pattern. This produces a genuinely appealing outcome with extra depth.

No 5
Matt ending abrasive wheel
Basically shift the wheel in only one particular path to build a pretty linear and refined satin end.

No 6
Frosting wheel – Inexperienced
Covering the overall place, use straight even actions and repeat the course of action to emphasise the element even more. This is the coarsest of the frosting wheels and offers a genuinely shimmery end

Move 3:
Soldering the posts
Be certain the backs of the triangles are clean up, totally free from grime and finger prints by supplying a swift rub with 1,200 grit emery paper to allow for the solder to stream simply. Line up your triangles on your soldering block and include a compact sum of flux to the area in which the submit will be put. You can evaluate and mark the point with a scribe or by eye.
Heat the solder pallions and scoop them on to the posts and then convey the put up over to the piece, warmth the piece and solder on the post. (You can also sweat solder the solder to the earring initial and then include the submit if you choose). Quench in drinking water and position in the pickle.

Step 4:
Final polish
At the time out of the pickle the backs might require a bit of a clean-up. We recommend pink scotchbrite radial discs, which will clear up nicely devoid of harmful the cleanse-up you did prior to pickling. If the fronts require a bit of interest, leading up some textures or frivolously polish any regions you would like to “pop” with a comfortable wool mop and rouge

And there you have some minimal textured studs to mix and match. There is so several textures you can make using different equipment, so have a participate in all-around and see what you build. Normally remember to stay secure by putting on the suitable PPE – enjoy!

We want to know what you have been building! Share your creations with us on social media, tagging in Cooksongold on Fb, Twitter and Instagram
Help you save this for later on

Zoe Jane Jewelry
Loving to experiment and delve into a assortment of processes, I incorporate equally fashionable and common techniques. These consist of misplaced wax casting, stone in location casting, delft clay casting and the historical artwork of granulation.

Each and every person piece is personally handmade by me in my studio on the beautiful Essex/Suffolk border, alongside my 7 cat helpers.
[ad_2]
Resource link


More Stories
How Women Are Redefining Success in 2024
Top Wellness Tips for Busy Women
Fashion Trends Women Should Watch This Year